

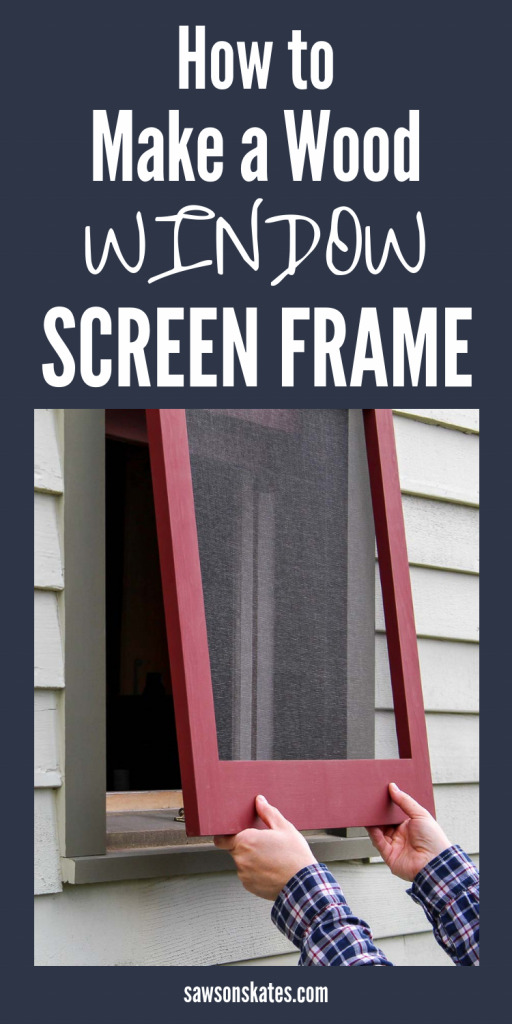
How To Make A Window Screen
Learn how to make windows screens! Use this step by footstep tutorial, a few pieces of forest and some uncomplicated tools to build your ain DIY window screen frame!
Learn How to Make Window Screens for Your Home
I'one thousand ready to open my windows and let some fresh air in. The problem is I demand to make new forest window screen for i of my windows. Do you take broken or missing screen? No worries, because today I'm going to show y'all how to make a window screen, so you lot can permit some fresh air into your home!
Originally published May x, 2016, updated May 28, 2019
This tutorial contains affiliate links to supplies and tools. Purchases made using these links help support the Saws on Skates website and allows me to share more than projects and tips with you. There is no cost to y'all for using these links. Visit my site policies for more information.
How to Brand Window Screens for Old Homes
My 1850s business firm was lovingly cared for past the previous owners. They restored the forest siding, front end porch, and added a reclaimed antique forepart door.
At some betoken, aftermarket aluminum storm windows were added to the business firm. And that's the one surface area the previous owners didn't impact. The house looked similar it was from the 1850s and the aluminum storm windows looked like they were from 1950s.
The aluminum storm windows looked out of place, just they were too missing all of the screens. Opening the windows meant insects and bees were constantly buzzing around the house.
One of my first projects was to remove the aluminum storm windows. Then I built new woods DIY window screens and wood storm windows that amend fit the await of the old home.
How to Brand Window Screens: Accept Measurements
To make the DIY window screen I first took measurements from side to side (between the exterior window trim) at the top and bottom of the window.
Next, I took measurements from elevation to bottom (between the exterior trim and the window sill) on the left side and right side of the window.
I subtracted a ¼" from the smallest side to side dimension and I also subtracted a ¼" from the smallest peak to bottom dimension. These were the dimensions I used to build my wood DIY window screen. Subtracting a ¼" will permit for ⅛" of motility due to seasonal changes around each side of the window screen.
What Wood Should You Use?
I had some common pine on hand, and that's what I used to build my windows. Pino is not the all-time option for exterior projects because it is not rot-resistant or insect resistant. A better pick would be douglas fir, southern yellow pine, or some other rot-resistant wood.
How to Install Window Screen in the Frame
There are several ways we can attach the window screen material to our DIY window screen frame.
The more than traditional way would exist to staple the window screen material to the frame. Then cover the staples with wood window screen molding.
The more mod way would be to employ window screen spline in a groove to attach the window screen material to the frame.
The wait of my 1850s house is very simple. It's more than of a farmhouse style. To me, the simple look of the screen installed with spline better fit the design of my firm. So this is the option I went with.
How to Brand Window Screens With Spline
I used a router and a ⅛" router bit to brand the groove for the spline. I installed the bit in my router and set up the depth of the router flake to ¼".
Then I used a Kreg Multi-Mark to marker where I wanted to rout the groove for the spline.
Adjacent, I attached a fence to the router and routed the grooves on each side of the frame.
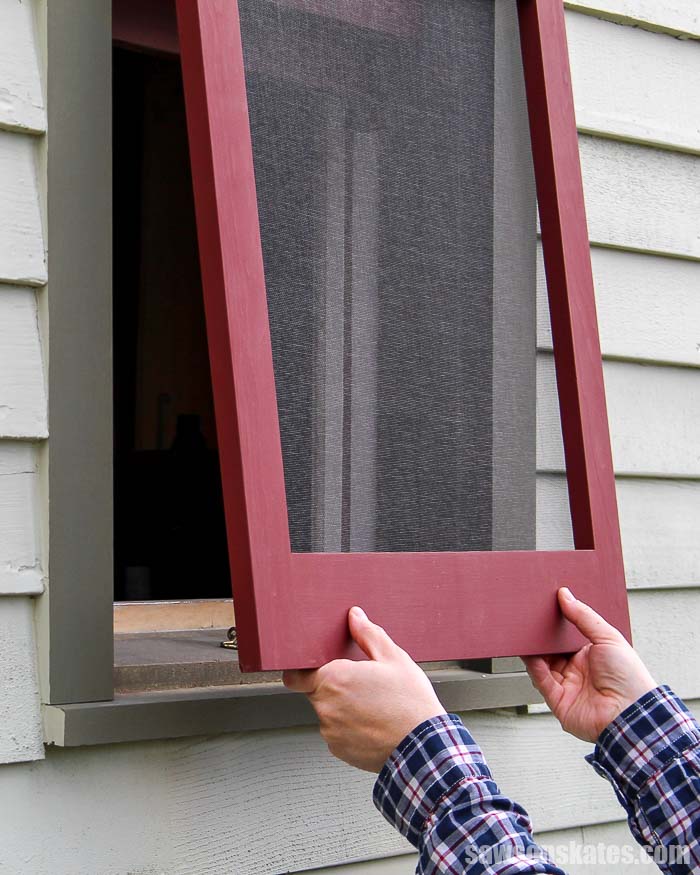
How to Attach a Woods DIY Window Screen
Traditional Installation
The about common manner nosotros can install a forest DIY window screen is with window screen hangers. 2 hangers are fastened to the window trim and ii respective clips are fastened to the window screen. The clips slide over the hanger and keep the screen in place.
DIY Installation
My aunt is also an old house fanatic, and so of course, I shared with her how I planned to install my wood window screens. She had another idea that would give the windows a cleaner look.
Her suggestion was to drive 2 screws in the top of the window screen and drill corresponding holes in the underside of the window trim.
The screws are left proud about a ½" and act like pins. The holes in the underside of the trim are drilled nearly ⅜" deep. The pins are inserted into the holes and lock the top of the screen in identify. Think of it like calculation a leafage to an expandable table where the pins of the leaf fit into the holes in the tabular array.
A claw and eye at the bottom locks the screen in identify.
I have received many questions about this installation method. I've tried taking photos, but it was catchy to properly photograph so that you could see what I was doing.
Instead, I created some sketches. I'll preface this by saying this is still not as clear as I would like it to be. And then delight bear with me. If y'all're still unsure, I advise making a jig with some scrap wood and testing it out. I think it may become easier to empathise that way.
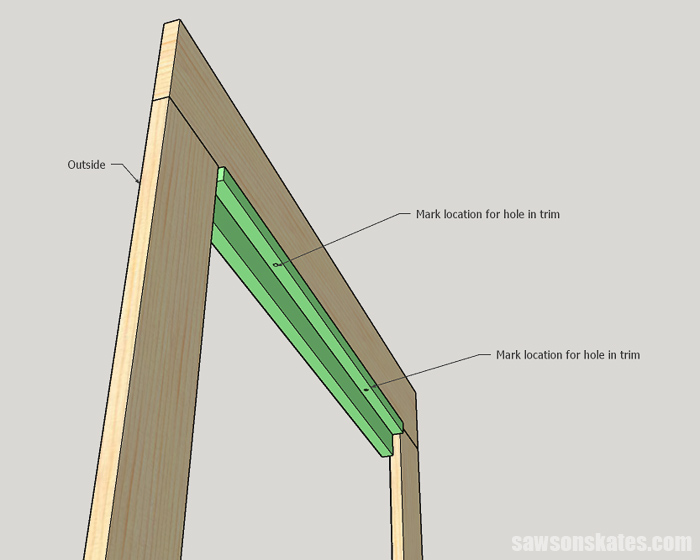
Brand a Jig
I started past making a jig from scrap woods.
In this sketch, the jig is placed on the outside of the window screen. Simply in this view, nosotros are looking down and from the within of the business firm.
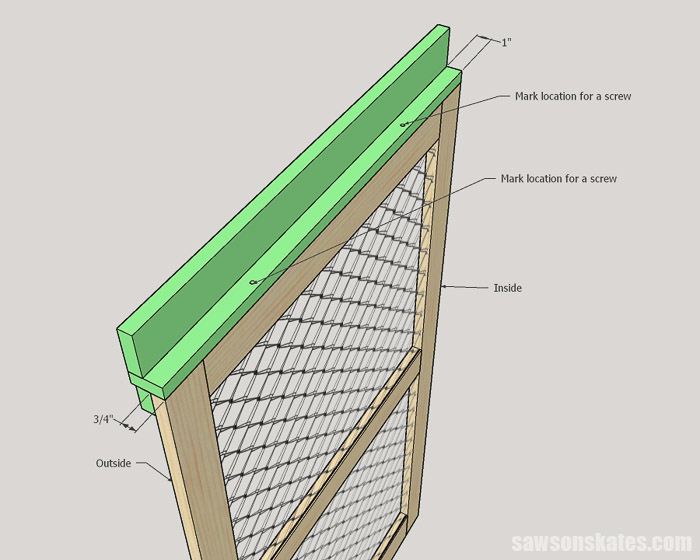
The bottom of the jig is fix for ¾", the thickness of the storm window. The tiptop of the jig is fix for 1″, the distance I needed to set the storm window in the opening correctly. Your measurement may be unlike.
2 holes were drilled through the top of the jig. These holes volition exist used to mark the location of the screws that will human action like pins. Later, they will be used to mark the location for holes on the underside of the trim.
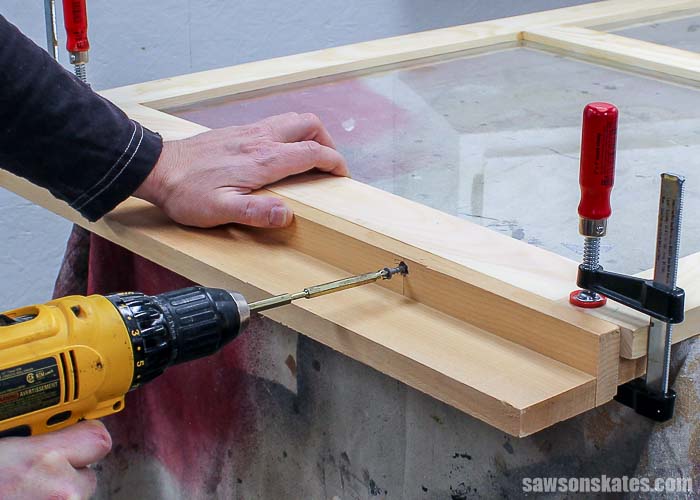
In this photo, the jig is clamped in place, and I am driving a screw that will human activity as a pin.
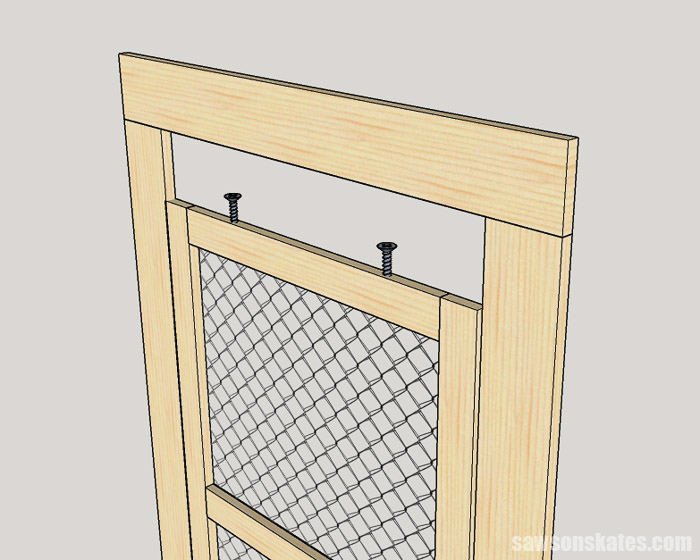
And then the jig is placed on the window trim. In this sketch, nosotros are continuing in the yard on the outside of the house.
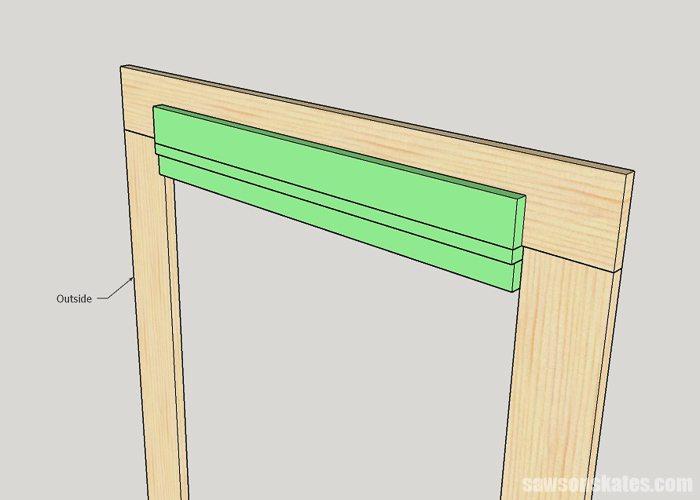
To run into the adjacent stride, we have to await from inside the house. You lot can do this step outside, only we need to look up, and from the inside, so you meet what to do.
Apply an awl to marking the centre of each pigsty in the jig on the underside of the trim. Then, apply a ¼" Forstner bit (or any size bit volition fit the screws you are using) to drill a hole ⅜" deep at each location.
Related: What is an Awl (+ How to Employ it)
Now, the pins (screws) tin can be inserted into the holes. All that is left is to add a hook and eye to the bottom of the screen.
Adaptable Window Screen Frames
Shop-bought adaptable window screens are available if you lot don't have the tools or time to brand a DIY window screen. Below are some options you can buy online and accept shipped to your home.
How to Brand a DIY Window Screen
- Measure the window opening
- Cut the window screen frame pieces
- Gather the window frame and utilise a router to cutting a groove for the spline
- Pigment the frame and install the window screen cloth
- Install the forest window screen in the window opening
Window Won't Stay Up?
Want to let some fresh air in your new DIY window screen just your window won't stay open? I take an easy solution for you. And you can brand it with chip wood in less than x minutes.
Skate over to Window Won't Stay Up? Brand This! and check it out now!
Are you lot gear up to learn how to make window screens? They're easy to build and perfect for antique-fashion or historic homes. Let'due south get edifice, so nosotros tin let the fresh air in and go on those pesky bugs out!
Step 1. Mensurate the Opening
I first took measurements from side to side (between the exterior window trim) at the top and bottom of the window.
Next, I took measurements from pinnacle to bottom (betwixt the exterior window trim and the window sill) on the left side and right side of the window.
I subtracted a ¼" from the smallest side to side dimension, and I subtracted a ¼" from the smallest pinnacle to bottom dimension.
These were the dimensions I used to build my DIY window screen. Subtracting a ¼" volition permit for ⅛" of movement around each side of the window frame.

Step 2. Cut the Window Screen Parts
I used the dimensions from Pace 1 to determine the length of my window screen parts. Cut ii stiles from 1×3 to 48″. Cut 2 rails from 1×3 to 22-three/four″. Cutting ane bottom runway from 1×4 to 22-3/iv″.
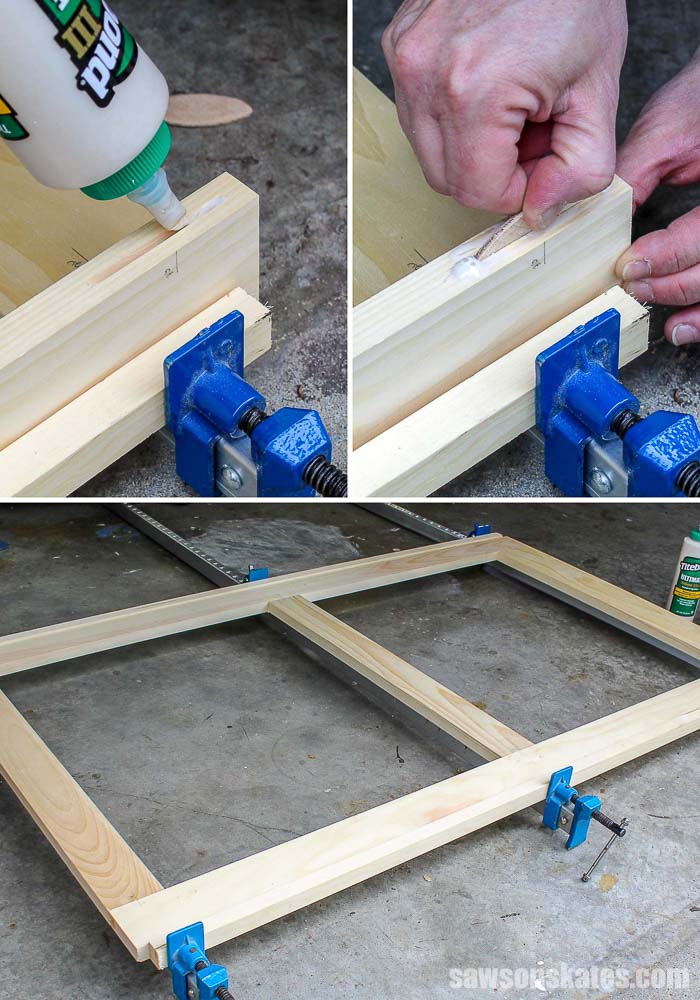
Step iii. Cut the Biscuit Joints
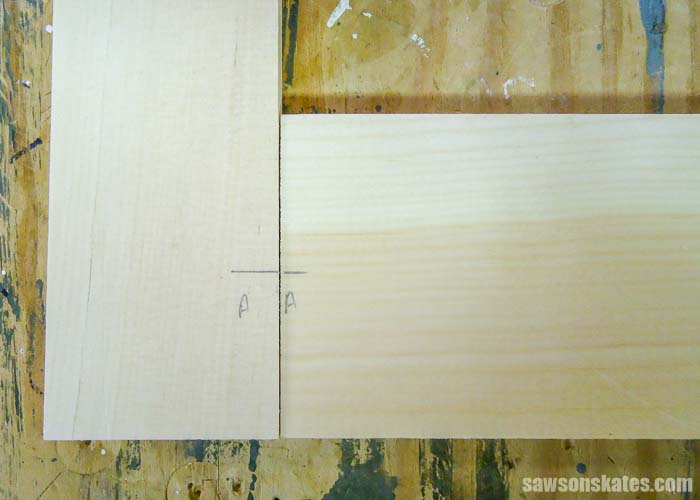
Layout the DIY window screen pieces. I used a Kreg Multi-Mark to locate the heart of each rail.
I transferred those marks to the stiles and labeled each joint. I fix the beige joiner for #10 biscuits for the 1×3 joints and #20 for the ane×four joints. Then I cut the biscuit slots.
Related: Kreg Jig vs Beige Joiner: Differences of Pocket Holes and Biscuit Joints
Step iv. Assemble the DIY Window Screen
I laid out the pieces to form the frame and test fit biscuits in all of the joints. I recut any slots where the biscuit didn't properly fit.
I applied glue to all of the joints, inserted biscuits into the slots and clamped the frame. I measured from corner to corner to be sure the frame was square.
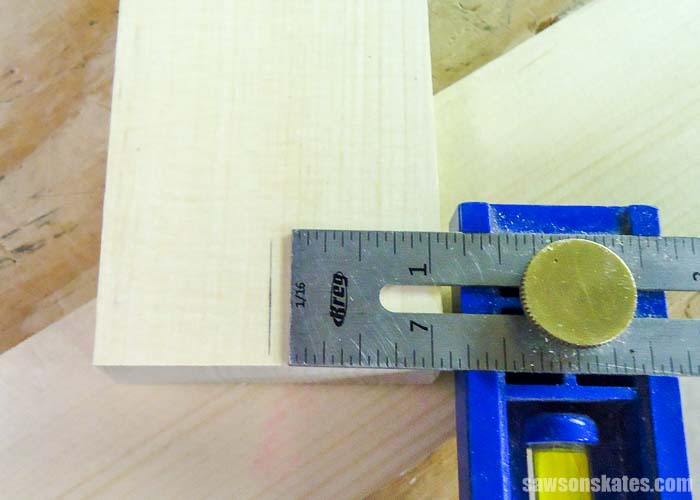
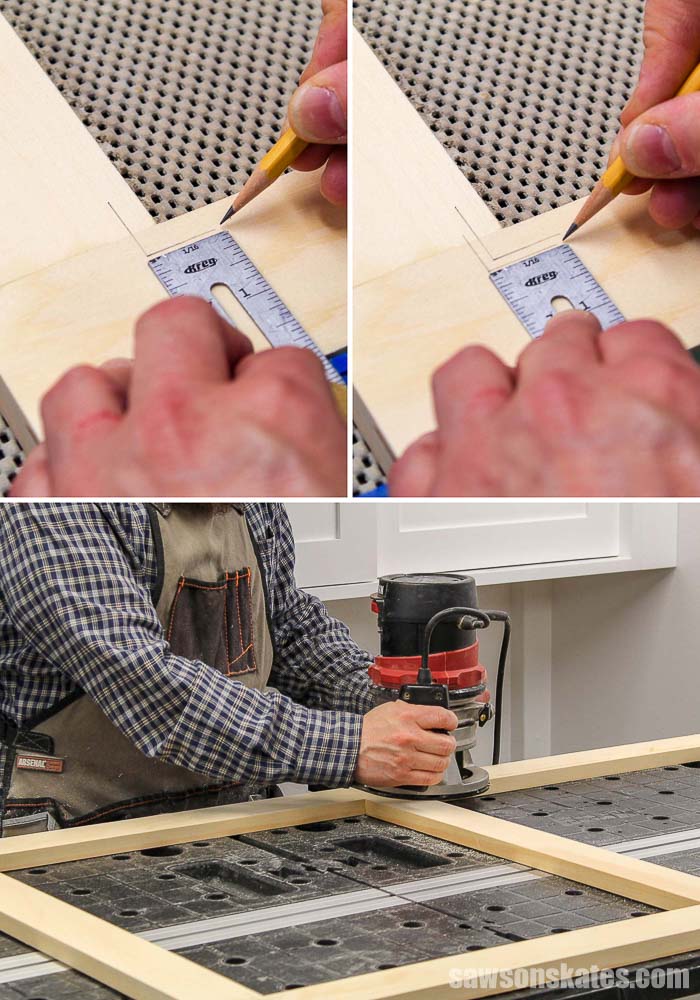
Pace five. Cut the Groove for the Spline
I used a Kreg Multi-Mark to measure 3/8″ from the inside border of the frame. Then measured ane/8″ from that mark. The groove for the window screen spline will be cutting within these two marks. These marks locate the corners so nosotros'll know where to start and end the cut.
I used the Kreg Multi-Mark to set up the depth of the bit to 1/four″. And so I used the marks on the frame to set the router debate. I routed the sides and pinnacle outset every bit they are the same width. I started at the corner, plunged the router chip into the layout line and worked towards the opposite corner.
Related: How to Utilize Router Table for Beginners
I stopped the router at the reverse corner, repositioned information technology on the next side and cut the next groove.
Then I adjusted the contend to the proper depth for the lesser rail and cut the final groove.
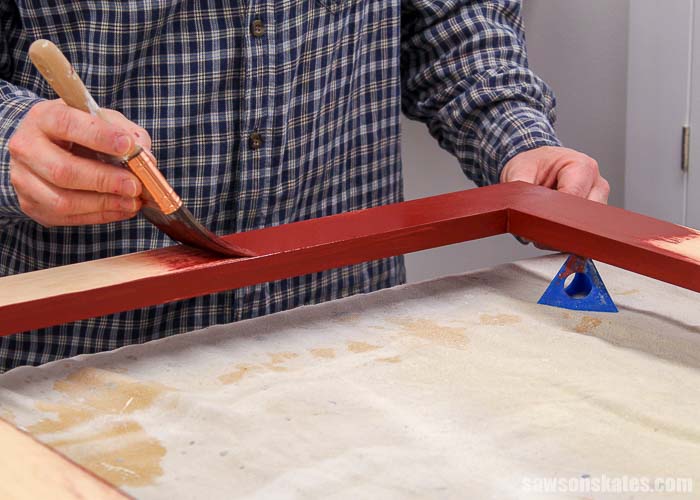
Footstep vi. Paint or Stain the DIY Window Screen
I used a Purdy Cub Paint Brush to employ ii coats of outside stain to my woods window screen frame.
Step 7. Install the Screen
Click here for the How to Supervene upon a Window Screen tutorial.
Final Thoughts
Now you know how to make windows screens! Grab a few pieces of wood assemble some simple tools, and follow this step by stride tutorial to build your ain DIY window screen frame!
Go the free plan (including the detailed instructions and measurements) at present!
Give thanks you for stopping by. If y'all found this information helpful, would y'all delight pin it to Pinterest? Other DIYers would capeesh information technology and I would too! Cheers – Scott
Pin This For Later

How To Make A Window Screen,
Source: https://sawsonskates.com/diy-wood-window-screen-frame/
Posted by: martinezwassfy.blogspot.com
0 Response to "How To Make A Window Screen"
Post a Comment